Using ODB with Microsoft Visual Studio
From Code Synthesis Wiki
(Difference between revisions)
Current revision
A common way of integrating the ODB compilation step into Visual Studio project is with the custom build steps. With this method you first add the header file that defines persistent classes to your project. Then specify the command line to compile it as well as the output files. When the project is built, VS IDE checks if the output files do not exist or out-of-date compared to the header file and executes the specified command line in order to regenerate them. The following step-by-step instructions describe how to accomplish this:
- Add the header file (for example, hello.hxx) to your project ("Project"->"Add Existing Item" menu action).
- Open the Properties dialog for the header file (select the header file in the Solution Explorer and choose "Project"->"Properties" menu action).
- Change Configuration to All Configurations and Platform to All Platforms.
- In the Properties dialog select the General tab and choose "Custom Build Tool" for the Tool (VC9) or Item Type (VC10 or later) field. Then press the Apply button.
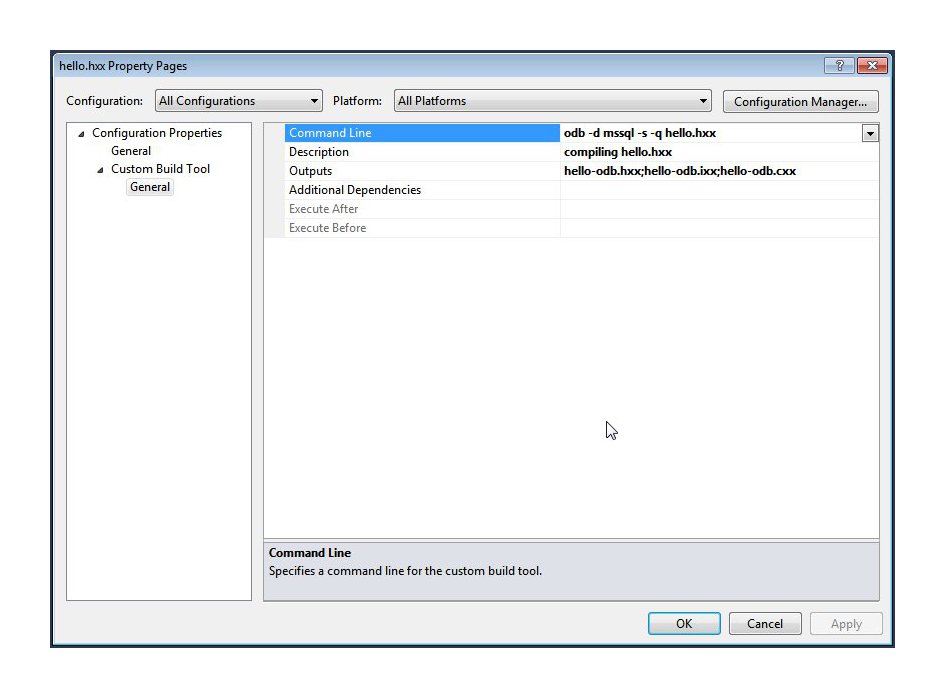
- In the same Properties dialog select the "Custom Build Step" tab. There you will have the "Command Line", "Description", "Outputs", and "Additional Dependencies" fields. Fill them depending on how you want to compile this header, for example:

- Press the Ok button to close the Properties dialog.
- Compile the header by selecting the header file in the Solution Explorer and choosing "Build"->"Compile" menu action. This will result in the output files (for example, hello-odb.hxx, hello-odb.ixx, and hello-odb.cxx) being created.
- Add the output files (for example, hello-odb.hxx, hello-odb.ixx, and hello-odb.cxx) to the project ("Project"->"Add Existing Item" menu action).
- Your project will also need to link to at least libodb and libodb-<database> (for example, libodb-mssql for SQL Server) libraries. For details on names of these libraries for Win32/x64 and Debug/Release builds, refer to the INSTALL file accompanying each library. Once you have identified the library names, you can add them as Additional Dependencies in the Linker's Input tab. To accomplish this, select your project in Solution Explorer and choose "Project"->"Properties" menu action. Select the Linker tab, then Input sub-tab, and enter the library names into the Additional Dependencies field.

